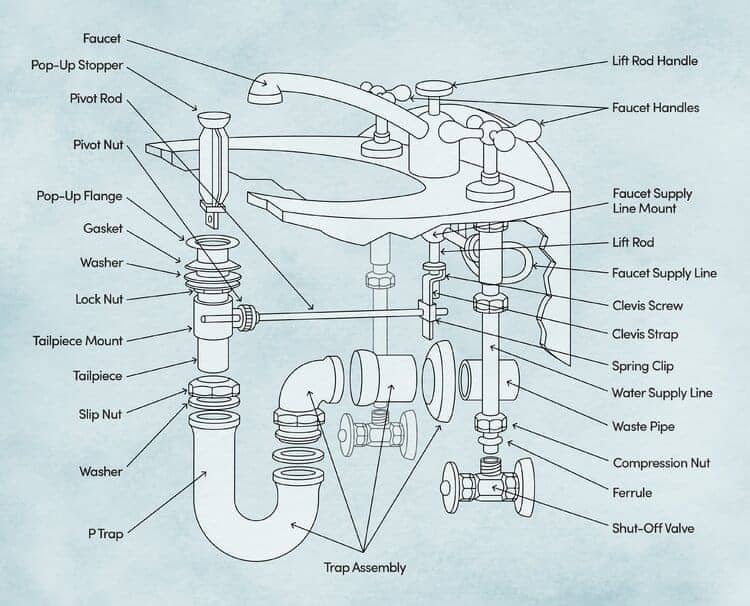
Bathroom Vanity Drain Assembly
Most people have at least a vague idea of how a bathroom sink works, but some might have less understanding of what all the parts are called – which can be a problem if you need to buy replacements. To help, here we discuss the various bathroom sink parts and what they do.
Bathroom sink drain parts

1. Shut-off valve
The shut-off valve is where the water reaches your sink system from the main supply. If you want to stop water flowing into your sink, you can shut it off at this valve before doing any plumbing work on your sink.
Water reaches these valves under pressure, and there are normally two valves, one for hot water and one for cold.
The water arriving at the hot water shut-off valve comes from your water heater while the water arriving at the cold shut-off valve comes directly from your main supply.
2. Ferrule and compression nut
The shut-off valve connects to the water supply line, which takes the water up to the faucet. The two are connected by a ferrule and a compression nut to ensure a firm, watertight seal.
3. Water supply line
The supply line, also known as a supply tube, is a short section of pipe that carries the water from the shut-off valves up to the faucet.
Water arrives in the water supply line under pressure, which is what forces it up to the faucet, ready to flow out when you open the faucet.
4. Faucet handles
This part is familiar to everybody. Faucet handles come in many shapes, styles and sizes, but their purpose is the same. You turn the faucet handles to open them when you want water and you turn them in the opposite direction to close them when you want the water to stop.
You may have either one or two faucet handles. In some models, you have one for hot and one for cold while with others, hot and cold water is controlled with one lever.
5. Faucet

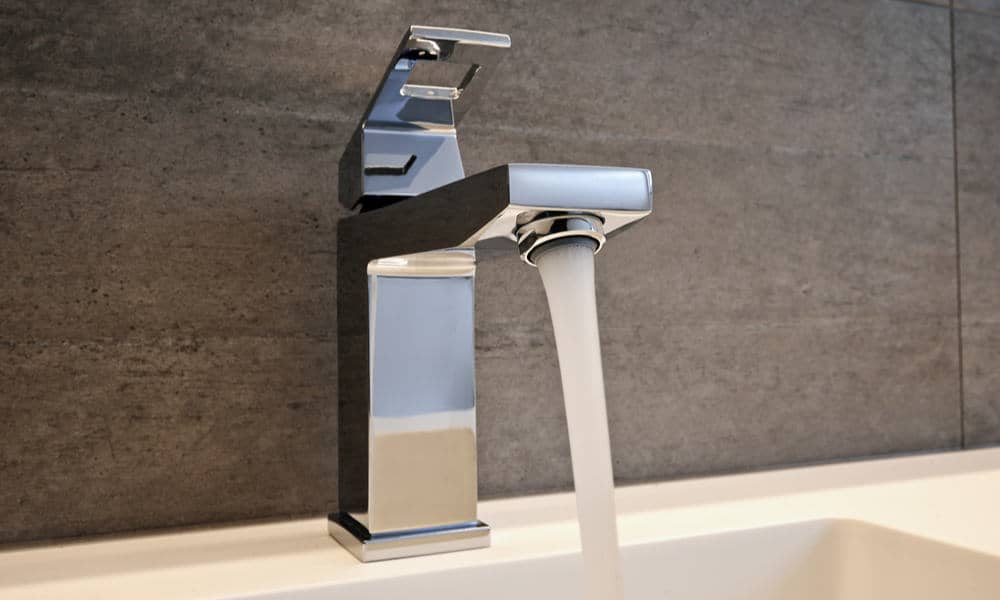
Another very familiar part of the bathroom sink, the faucet – also known as a "tap" – is the part the water comes out from.
6. Lift rod handle
This is the part that controls the stopper. You normally pull it to lower the stopper and push it to raise the stopper.
7. Pop-up stopper
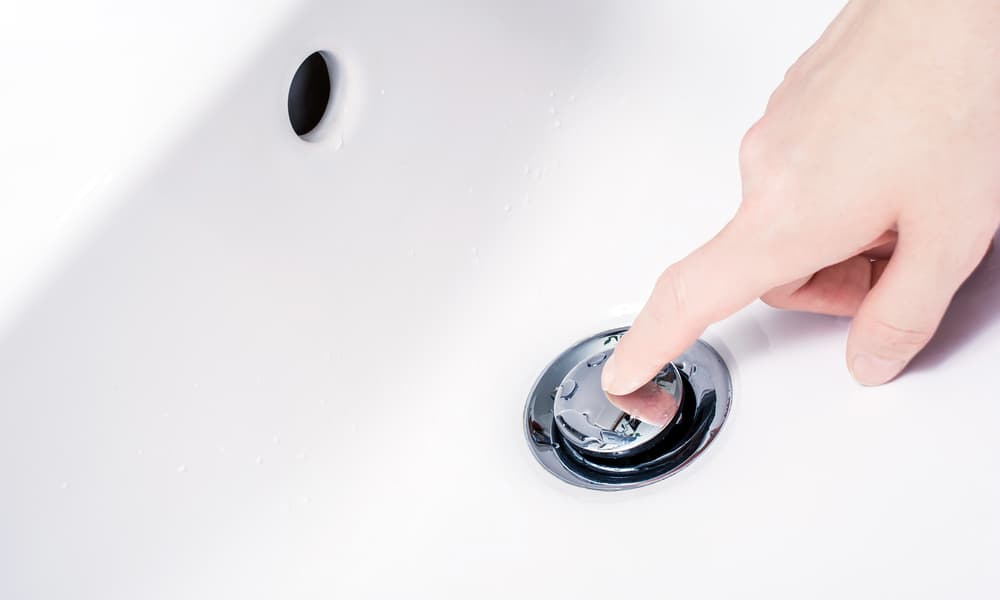
The pop-up stopper is the part that sits in the plug hole and moves up or down when you use the lift rod handle. Sometimes bathroom sinks don't have these, instead, incorporating a stopper on a chain that you simply use by hand.
8. Pop-up flange
The pop-up flange is the part where the pop-up stopper moves up and down in the plug hole and that keeps the system watertight, preventing any water from dripping through.
9. Gasket and washer
The housing for the pop-up stopper (if you have one), including the pop-up flange, is connected to the next section by a gasket. This also contains a washer to ensure a watertight seal and prevent any leaks.
10. Locknut
Below the gasket and washer, there is a locknut that secures the upper part of the drainpipe to the tailpiece, the part that takes the water down to the P-trap.
11. Tailpiece
The tailpiece is the section of pipe that takes water and other waste from the sink down to the P-trap and through to the waste pipe.
12. Tailpiece mount

If your sink has a pop-up stopper, it will also have a tailpiece mount. This is the part where the horizontal rod that works the stopper meets the tailpiece. This rod moves up and down to control the pop-up stopper.
If you need to remove the stopper, either for unblocking a clogged sink or for another reason, you will have to unscrew it from the tailpiece mount.
13. Pivot nut
The pivot nut is what connects the stopper rod to the tailpiece mount. This piece allows the pivot rod to move up and down, controlling the stopper. To remove the rod, you need to unscrew this nut.
14. Stopper pivot rod
If you have a sink with a pop-up stopper, there are a few pieces that connect the lift rod handle to the stopper. The pivot rod is a horizontal piece of metal that meets the tailpiece at the tailpiece mount and is held in place by the pivot nut.
It is connected to the stopper inside the tailpiece, and when you use the lift rod handle, it moves the rod, which in turn, moves the stopper up or down.
15. Spring clip
The spring clip is a small clip, usually metal, that attaches the rod to the clevis strap.
16. Clevis strap
The clevis strap is a vertical strip of metal with holes in that is connected to the rod at the bottom and the lift rod handle at the top in sinks with a pop-up stopper.
When you pull the handle up, the strap moves up pulling the end of the rod it is connected to up with it. This causes the other end of the rod to move down, and since the rod is connected to the stopper, this pulls down the stopper, blocking the drain.
When you want to pull the stopper up again to drain the sink, you push the handle down and this moves the strap down. The pushes the other end of the rod up, pushing the stopper up and allowing the water to flow away.
17. Tailpiece slip nut
The tailpiece slip nut is a nut that connects the tailpiece to the P-trap. It will also contain a washer to ensure a watertight seal.
If you need to remove the P-trap for cleaning or other purposes, you need to unscrew the tailpiece slip nut to free the P-trap, allowing you to disconnect it from the tailpiece.
18. P-trap

The P-trap is a bend in the drainpipe that allows water and other waste to flow through but that retains a certain amount of water after each use to form a seal.
This is important because, without a trap, gases from the sewer would be able to pass up through the pipe and into your home, creating an unpleasant odor.
P-traps are so named due to the shape of the bend, which looks a bit like the letter "P".
Some P-traps also include a clean-out plug, allowing you to clean the trap easily without needing to remove the trap completely.
Unlike the water that arrives at the faucet, the water leaving the sink through the drain is not under pressure, relying on gravity alone.
Gravity causes the water to flow down through the tailpiece, and the weight of the water is enough to push it through the P-trap while leaving enough water in the P-trap to create the necessary seal against bad odors.
19. Trap assembly
The trap assembly consists of the P-trap itself along with several other pieces that connect the P-trap to the waste pipe while also preventing any leaks.
20. Waste pipe
The waste pipe is the final part of the sink's drain system that takes the waste that passes through the P-trap out towards the sewer system.
A few plumbing tips
Here are a few tips about which parts to look at if you experience any problems with your bathroom sink's plumbing system.
Blocked sink – stopper
If your sink becomes blocked, the first thing to check is the stopper since this section can easily become clogged with hair. All you need to do is unscrew the pivot nut and remove the pivot rod.
This will allow you to clean the upper section with a hair removal tool, which, in most cases, will solve any problems with blockages.
Blocked sink – P-trap
If the sink is blocked and the problem is not due to hair and gunk in the upper section, you may also try cleaning the P-trap section.
If your P-trap is a model that has a clean-out plug, the job is much easier. You just open the plug, drain out any water and pull out anything that has become stuck in there, screw the plug back on, and you're ready to go.
However, if you don't have a clean-out plug, you will have to remove the whole P-trap and trap assembly section to gain access. This is not an especially difficult job, but it's much more complicated than just opening the clean-out plug.
Shut-off valves
Whenever you need to do any maintenance jobs like this, the first step should always be to shut off the water at the shut-off valves. This will prevent water from running into the sink as you work.
After closing the shut-off valves, it's always sensible to work with a bucket beneath the sink since this will catch any water that runs out of the system when you start to disassemble the different sections.
Variations are possible – but most are similar
Not every bathroom sink is the same, and you may find that yours is slightly different to what we have described here. However, most are fairly similar, and with this guide, you should be able to identify the various components of your sink.
Bathroom Vanity Drain Assembly
Source: https://www.sunrisespecialty.com/bathroom-sink-plumbing-parts

0 komentar:
Posting Komentar